Mastering 101: How to Master a Song

Mastering Basics — Matthew Weiss breaks it down in this video. When talking about mastering, it’s very important to realize that it’s basically just another level of mixing. It’s solidifying the entirety of the record, ensuring that it translates, making last minute tweaks, things that you will want to see happen to the overall mix. In a perfect universe, you wouldn’t be doing necessarily much to the master. Sometimes, you might be doing things to the master simply because the effect works better there, but in general, if it’s to fix something, you usually want to address that in the mix. In fact, a really good mix does not need much when it comes to mastering. Alright. So, let’s listen to this record.
OK. So, when I ask myself about mastering, I’m essentially asking the same question that I’m asking myself through the mixing process, which is what do I want. What do I want to hear? Is this good enough? Does something need to go back to the mix? OK. Here’s my thoughts. First of all, I think that the mix is good. I’m happy with it. I think everything is sitting right. I think it’s all good. The only things that I want to hear is I want to hear a little bit more brightness and pop to the overall mix, and I wouldn’t mind if there was a little bit of extra sort of punch on the drums or some kind of homogenizing type of vibe, some kind of a compression vibe going for that kind of rock and roll sound. So, with that being said, what I’m going to do here is I’m going to pop in my outboard gear. I’m going to explain to you what I’m doing.
So, the first thing that I’m going to do is I’m going to just show you what the sound sounds like when I start engaging all of my outboard gear. So, this is with no processing being done, just going through the actual sound of all the devices. So before After There’s a certain nice little bit of saturation that I’m getting from my equipment that’s giving me a tone that I like to impart over the entire mix. It makes everything sound a little bit bigger, not vastly different, just a little bit. But when we’re talking about mastering, every inch counts. OK.
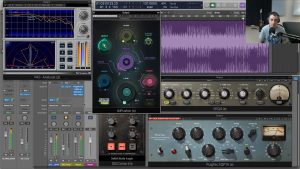
So, the first thing I’m going to do is… I sort of work it in reverse order. My signal chain here is an EQ to a compressor to another EQ. I’m going to do the final EQ first because the final EQ is just a very gentle treatment. I’m going to click it in right now. Actually, I’ll do a before and after. One more time. Listen to the top end specifically. Before.
After. That’s the Clariphonic equalizer. It’s one of my favorite EQ’s because you can add more brightness into something, somehow without changing the tonal balance of things. I don’t exactly understand, like it’s still a mystery to me how that’s even possible. It kind of does that, and so I feel like I can kind of put it on any mix. I can just make things pop a little more without actually disrupting anything.
Alright. Now, my first EQ. What I want to hear is a little bit more presence range. What I did is I sort of clicked around some different presence frequencies, and I ultimately found that 2.7 is the one that seemed to make it sing the most. I’m just going to pop that in real quick.
This is just a two decibel bump, nothing else. Before. After. Didn’t take much. That’s just a two decibel bump at 2.7. Suddenly, the mix just popped out. That’s cool. That’s all that I needed. I don’t think that it needs any kind of other EQ. It all sounds good to me.
Lastly, I’m going to engage some compression. When I’m thinking about compression, there’s sort of two different ideas. It’s a misconception that compression on the mix bus is about loudness. It’s really not. In fact, a lot of times, you’re going to lose potential loudness by using compression, especially in the fashion in which I’m using it. The way I’m using it is actually very slow attack, medium release compression. What that’s going to do is it’s going to cause the drums to trigger the compressor, but it’s not going to cause the compressor to actually reduce the transient impact of the drum. In other words, it’s going to make the drums a little punchier.
And at the same time, I have the release time just right where it preserves air, but it also creates some kind of similar movement throughout everything in the mix. So, it’s going to give it a little punch and a little bit of what people might call glue, but what I would call movement.
Alright. So, let’s pop that in. That’s before. Notice how we actually lost some level, even though the peak volume is staying pretty similar. I mean, the peak volume actually is being reduced slightly as well. We lost some level, but the drums stayed pretty prominent and pretty smacking. So, relative to everything else, the drums are becoming a little bit more prominent. That’s the way that I’m using the mix compression here. But, this is all dependent on what the mix is calling for. If I had really, really sharp pointed drums already, then I probably wouldn’t need to use compression in this sense. In fact, I would probably be doing the opposite, using faster compression and a faster release just to round the drums out.
Alright. So, that’s my mastering chain here. Let’s give the before and after. So, I hope you guys learned something. Take care.


